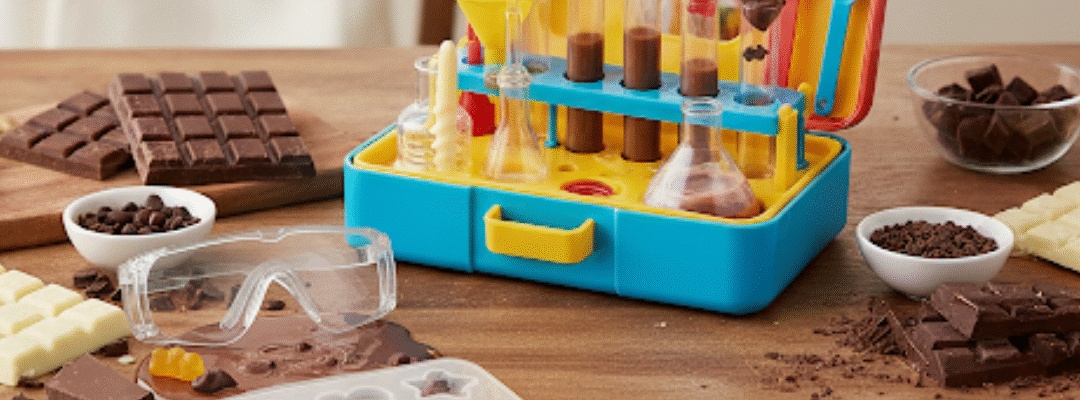
Chocolate: beloved by kids for its addictive sweetness and by librarians/teachers for its ability to immediately engage, excite, and educate!
Inclusion: Library programming is designed to be fully inclusive. Age limits may be implemented in certain programs to ensure that program content fosters appropriate developmental markers.
Accessibility: For participants who don’t wish to melt chocolate in their hands, specify alternate ways of melting it, like breathing on it, wrapping it in a paper towel and then melting in hands, putting it in sunlight, etc.
For participants with limited hand strength, provide grips or hand-grip holders to put on spoons, pencils, and markers.
Mode: In person
Staff Energy: High
Ages: 5+
Cost: Moderate
Length: 60-90 min.
Ideal Attendance: 15
STEAM Practices:
✓ Science
✓ Math
✓ Art
Tags: steam, ages 5+, food, chocolate, messy
Credit: Kate Davis
")
Supplies:
(Commonly on-hand supplies are not included in cost breakdown.)
- Chocolate discs (approx. 8 oz/child) $20.57
- Candy molds (preferably silicone) $32.97
- 18 Hershey bars (will need one per child, plus 1/8th of an additional bar) $19.47
- Treat-sized candy bars (different varieties like Snickers, Hershey bars, Kit Kat, Three Musketeers, etc.) ($15)
- Large, deep, transparent container (fish tank, plastic bin, etc.) ($7.00)
- Poster board $1.25
- Bowls
- Spoons
- Paper towels/baby wipes
- Baggies
- Masking tape
- Easel
- Scissors
- White copy paper
- Hershey bar wrapper template
- Markers/crayons/colored pencils
- Scotch tape
Total Cost: $6.40/per person based on calculated for 15 participants
ACTIVITY #1: Speed Melting
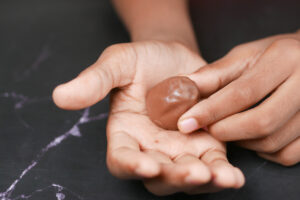
Who can melt their chocolate fastest? Each participant will receive one square of a chocolate bar and will experiment with how to melt it without tools. They can rub their hands together to generate heat. They can breathe on the chocolate. They can hold it close to their bodies. They can hold it on their tongue. But figuring out their own technique is all up to them! We will discuss why heat melts chocolate, note how long it takes to melt, how melting temperatures compare to our body temperatures, and what happens in the chocolate’s chemicals when it melts.
Supplies:
- Regular-sized Hershey bars (Any solid chocolate bar can be used, but the thickness of Hershey bars make them ideal for this experiment.
- Paper towels/baby wipes
Instructions: When starting this activity, engage the children in conversation about their favorite kinds of chocolate, then ask them if they’ve ever left chocolate in a hot car. What happens to it? Hand each child a piece of chocolate and tell them that their job is to soften/melt the chocolate. Ask them how they can make heat with their bodies in order to melt the chocolate quickly. If they are not sure, ask what they do when they’re cold. Do they make fists to keep their fingers warm? Do they cross their arms to keep their bodies warm? Explain that chocolate is made of a solid substance from the cocoa bean called cocoa butter. Cocoa butter melts easily, so it only takes a bit of heat to soften or melt completely. Cocoa butter, and therefore the chocolate, start melting at only 86 degrees. That’s the temperature of a warm, sunny day, isn’t it? Our bodies have a regular temperature of 98.6 degrees, which is warmer than the temperature that chocolate melts at. That’s why chocolate gets soft when we hold it and melts completely into a liquid if it is near or in a lot of heat.
If more conversation/discussion is needed while the students are melting their chocolate, ask them if added ingredients in candy bars, like crisped rice, nuts, or caramel melt like the chocolate does? After hearing the above explanation of why chocolate melts, they may be able to explain that rice, nuts, etc., don’t have cocoa butter in them to melt. (Time permitting, this would be a great time to mention that other ingredients like butter melt easily, too.) Allow the kids to eat their chocolate pieces, then wash their hands or use baby wipes to clean up.
ACTIVITY #2: DIY Chocolates
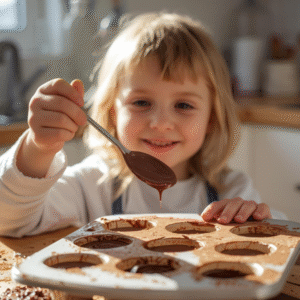
Participants create their own chocolate candies by spooning melted chocolate into candy molds, learning how quickly chocolate solidifies when it cools. When each child is finished, a staff member will place the mold in the refrigerator/freezer until set (approximately until the end of the Floating and Sinking activity).
Supplies:
- Chocolate discs (Approx. 8 oz per child)
- Candy molds (preferably silicone)
- Bowls
- Spoons
- Paper towels/baby wipes
- Baggies
- Marker
- Masking tape
- Optional: slow cooker (for melting chocolate in advance)
Instructions: While the Ice Breaker activity is happening, have an assistant melt the chocolate discs and separate the chocolate into four bowls. When ready to start this activity, have each child select a chocolate mold and label it by writing their name on a strip of masking tape. Set the bowls of chocolate in front of them (they will have to share) and have them take turns stirring it and noting its consistency. Instruct them to spoon chocolate into their molds and note how the chocolate changes as they stir, spoon and move it. Ask if they know why the chocolate is changing. It was heated to a liquid in the microwave, but as it cools, it is hardening back into a solid. Explain that their chocolate candies will hold the shapes they chose because the chocolate will cool and form in the mold. Ask if they have any ideas how they can make the chocolate harden faster. Place the molds in the refrigerator/freezer to set. After the large group activity, remove them and have the kids flip the molds over onto paper towels. Ask the kids to tell you why the chocolate sets into shapes and see if they remember the specific melting temperatures you mentioned earlier. Hand out baggies for the children to write their names on and put their chocolates in to take home.
ACTIVITY #3: Float or Sink Candy Bars
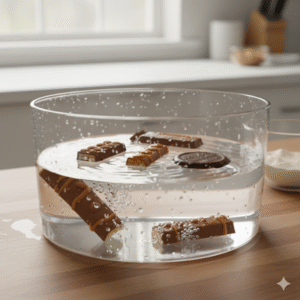
Density determines if something will sink or float in water. Candy bars filled with airy ingredients, like nougat and wafers, will float while those packed with nuts, caramel and fruit, will sink because there is not enough air to compensate for the weight of the ingredients. This activity will give participants a chance to test out the weight of each candy bar, make predictions about what they think will happen and track the results.
Supplies:
- Treat-sized candy bars (different varieties like Snickers, Hershey bars, Kit Kat, Three Musketeers, Peppermint Patties, etc.)
- Large, deep, transparent container (fish tank, plastic bin, etc.)
- Poster board/easel
- Scotch tape
- Scissors
Instructions: Before the event, draw a line down the middle of the poster board. Label one side “Float” and the other side “Sink”.
During the event, give each child a candy bar and explain: “A Kit Kat bar has a lot of empty space in between the chocolate and the wafer cookies. Those pockets contain air, which help keep the density low so the bar floats. The same is true for the 3 Musketeers bar. The nougat center has a lot of tiny air bubbles whipped into it, creating little pockets of air to keep the density low so it floats on the surface of the water, too. Like a Three Musketeers, the Snickers has a whipped nougat center but the pockets of air it contains aren’t enough to overcome the higher density of the peanuts, caramel, and chocolate. Hershey’s bars have the same problem. There are a few air pockets in the solid chocolate, but not enough to keep the bar from sinking” (Spangler, 2015).
Have each child in turn open their candy bar, gauge its weight, make a prediction, and drop it into the water. If it sinks, note how quickly or slowly it does so. When the result has been determined, have the child tape their wrapper to the Float or Sink side of the board.
When activity is complete, have children compare the types of candy bars that floated or sunk. Reiterate the concept of density and, time permitting, discuss other foods with which they might want to continue this experiment.
*Idea borrowed from Steve Spangler (Spangler, 2015).
ACTIVITY #4: Candy Bar Wrappers
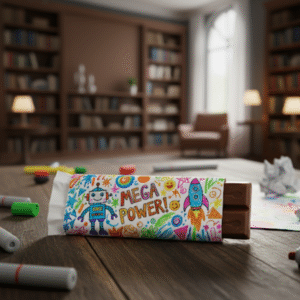
Participants let their sweet tooth rule their imaginations as they imagine a brand-new candy bar. With provided supplies, they design a wrapper for their creation. When they finish and show it to library staff, participants will receive a Hershey bar in which to wrap their wrapper.
Supplies:
- Hershey bars
- White copy paper
- Hershey bar wrapper template
- Markers/crayons/colored pencils
- Scotch tape
Instructions: Set out pencils, markers, colored pencils, crayons, and copies of the candy wrapper template on tables. If doing this activity as part of the Chocolate Lab, encourage participants to get creative with ideas for new candy bars. Remind them to come up with a catchy name that will make people want to buy their product. Let them know that there is a surprise waiting for them when they finish and show a library staff member their creation.
Staff Know-How
Planning, Set Up & Facilitation
- Be familiar with chocolate science before beginning the program as its a big part of what this program comprises. If that’s out of your wheelhouse, no problem! Just print out the above instructions to read/refer to.
- If using a slow cooker to melt chocolate discs, start melting two hours prior to program. Keep temp on low, otherwise the chocolate will burn and start to clump together.
- Cover every surface.
- To prep for Sink or Float experiment, draw a line down the middle of a poster board, labeling one side “Sink” and one side “Float”. Prop it on an easel so all kids will be able to see as you tally your results.
Pro-Tips
- You won’t need more than 1 treat-size bar of multiple kinds of candy unless you want to have extras on hand for kids to do the experiment on their own)
- Use only whole bars for the Float or Sink experiment. Cutting or breaking a bar will alter results.
- Have copious amounts of baby wipes on hand for clean up.
- Cover every surface.
- If you have staff assistance, you can make these activities into stations that run simultaneously. The Float or Sink experiement is best done as a whole group, though.
- If you do not have staff assistance, melt the chocolate discs in a slow cooker about two hours in advance of the program.
Marketing & Promo
Book Suggestions
Chocolate Lab Blank Book List (4.25 x 11 in).pdf
Resources are availabe in the SHARE catalog as of May 2025.
The book of chocolate : the amazing story of the world’s favorite candy (Newquist, H. P.)
Taffy Trouble (Perelman, Helen)
Crave-worthy candy confections with a side of science (Eboch, M. M.)
Charlie and the chocolate factory (Dahl, Roald)
Chemistry you can chomp (Alkire, Jessie)
Chocolate : sweet science and dark secrets of the world’s favorite treat
The Candymakers and the great chocolate chase (Mass, Wendy)
Josefina’s habichuelas = Las habichuelas de Josefina (Méndez, Jasminne)
The candy mafia (Tidhar, Lavie)
Candy Kingdom chaos (Keene, Carolyn)
How is cotton candy made? (Hansen, Grace)
Cakes for kids : 40 easy recipes that will wow! (Lalbaltry, Juliette)
The chocolate chase (Geronimo Stilton)
The dragon with a chocolate heart (Burgis, Stephanie)
Milton Hershey’s sweet idea : a chocolate kingdom (Katz Cooper, Sharon)
Reusability
Plastic tub can be used for storage or future programs.
Chocolate molds can be used for other food-programs (do not use the same molds for wax melting/soap making).
Create a DIY chocolate program for adults, with additional colors of chocolates and more molds.